Understanding Color Temperature: Manage the Light in Image
f you are a budding photographer or somehow related to photography, you often encounter some terms you have no idea or clue about, and “Color Temperature” is the best. Its name doesn’t give you a slight idea of what it is about. But let us tell you, the colour temperature plays a vital role every time you click a picture.
This article will help you understand what colour temperature is and how it affects your photos so that you can create compelling images featuring natural, neutral colours or boldly coloured hues. Keep reading:
What do you Mean by Color Temperature?

Have you ever noticed a blue or orange tint in your photos? All things that should be in white in your pictures take on an unusual colour. This is where the concept of Color Temperature comes into the scenario.
Colour temperature is one of the most determining qualities of how a light source reflects the human eye and camera sensors. You must adjust the colour temperature to make your pictures look warm, glowing, cool, or muted.
Colour or light temperature is simply the colour of light that gives an image a hint of coolness or warmth. Every light has a unique colour, from the sun's rays to your computer screen.
The colour of light tints all the colours in the scene and deliver various effects. Our eyes see something as white, even if the lights are mixed with the white surface. But our cameras record the colour.
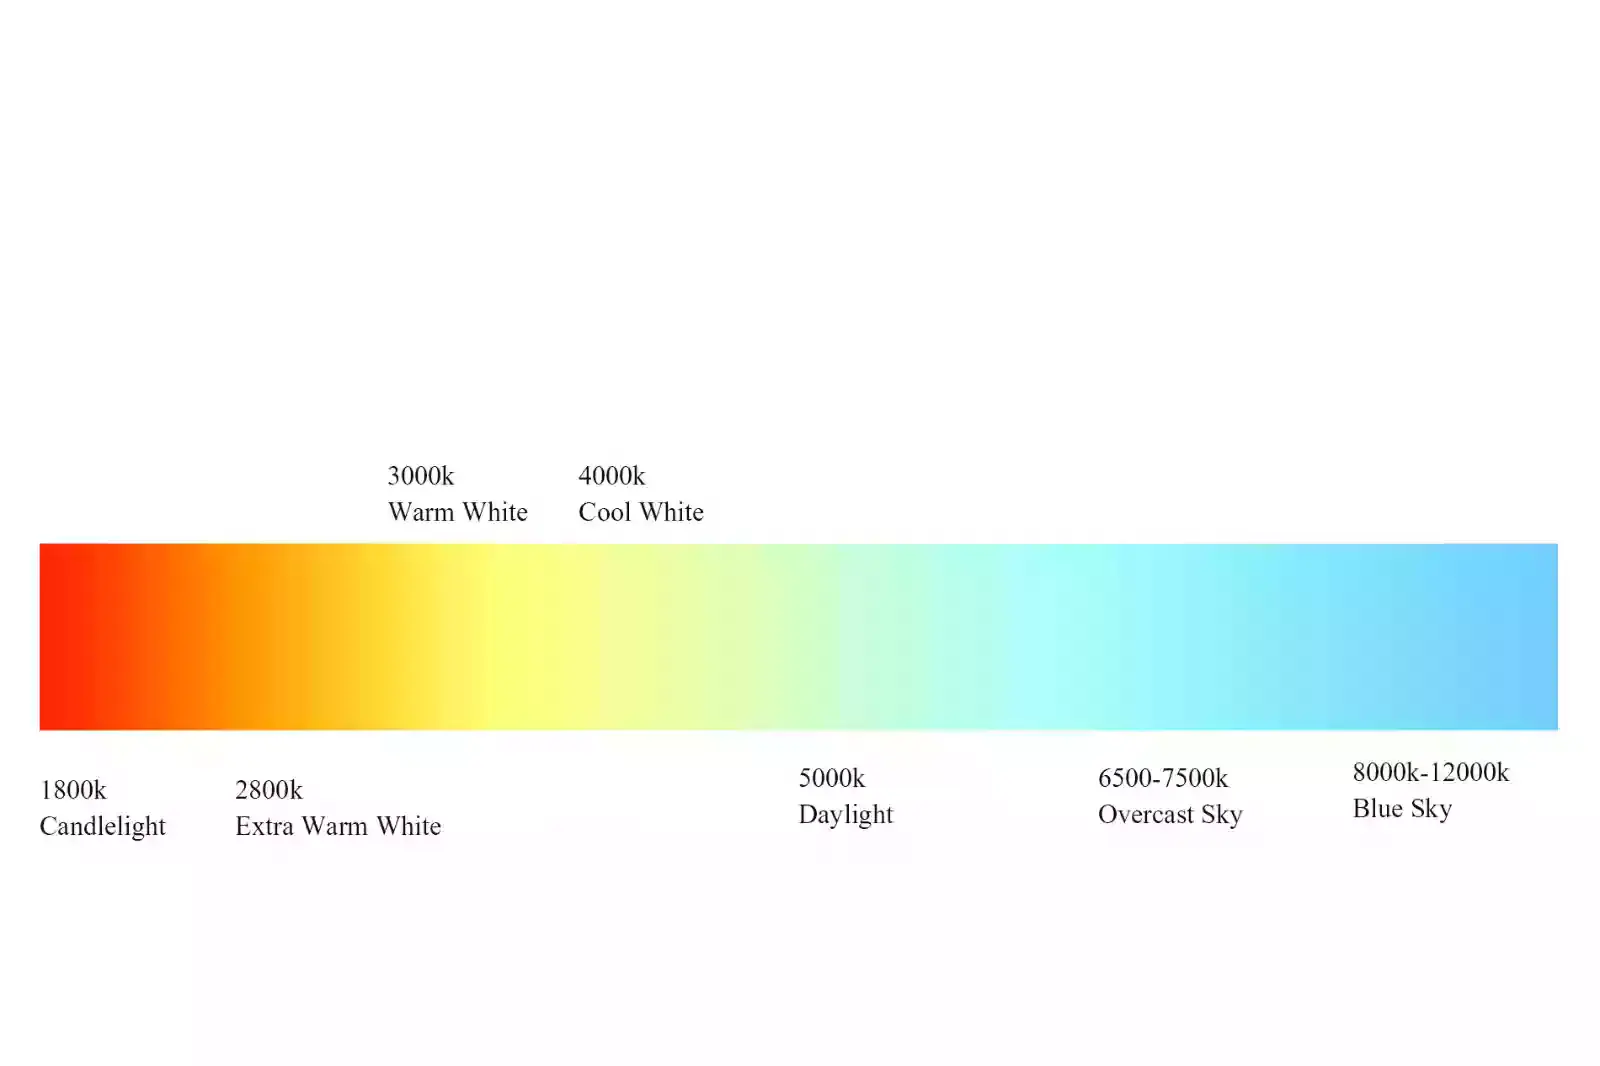
These different colours can be expressed using a number, and this number is known as the Color Temperature. It is measured in degrees Kelvin and denoted by the letter “K” after the number.
Managing White Balance In The Image

Now that you understand the colour temperature, you might think, “How does this apply to photography?” This is where white colour balance comes into play. White balance is simply an adjustment in digital cameras that determines how Kelvin's temperature will reflect true white.
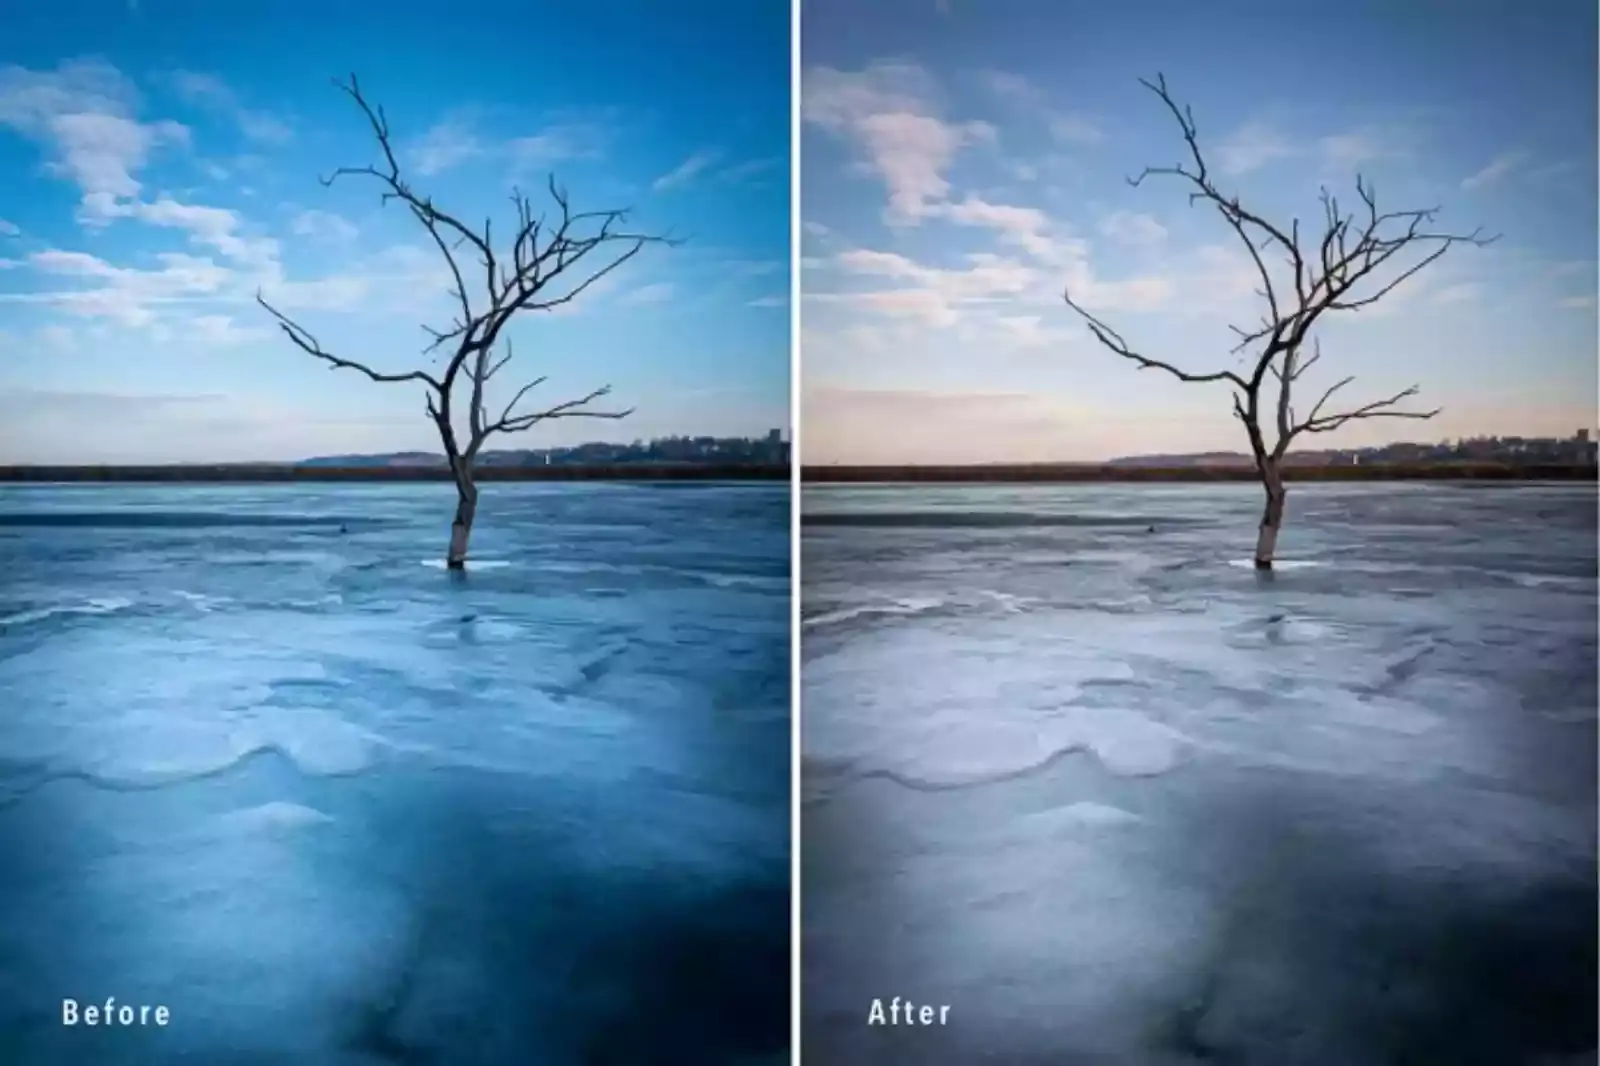
This is essential for shooting colours and light sources as they originally were. So, if you have an orange or a blue image, a white balance can make it look all-natural. White balance helps in image correction and eliminates colour casts, so different lighting hues can be compensated.
For example, if you capture an outside scene in natural daylight, the colour temperature would be 5500 K. You must set your white balance to 5500 K in your camera to match the light source.
Why does Color Temperature in Photography Matter?

Now that you know all about colour temperature and maintaining a sound white balance, it's time to get the most important thing: "why light temperature matters?”
Human eyes can segregate colour casts in a scenario and instantly make everything appear natural. But your camera, on the other hand, is not that efficient. So, when you photograph a picture under warm light, you end up with a solid yellow/orange/red colour cast.
But you can compensate for this colour cast using “White Balance”. The temperature can alter the mood of an image and can simultaneously make a dull picture cheerful.
How to Edit Color Temperature?

By using a variety of online image editing & manipulation software, you can adjust the colour temperature in your images. Some of them are here as follows:
Lightroom - Step-By-Step Guide to Adjust Color Temperature
Step 1 - Open Lightroom, go to the Library and import the image that needs editing.
Step 2 - Once it is imported, select the image & develop it.
Step 3 - Go to the Basic Panel Toolbar on the right side and select the temperature option.
Step 4 - Under the Custom section, set by default at 0. For a cold blue tone, adjust it to 100, and for a yellow & warm tone, slide it to +100.
Step 5 - Save your image and export.
Photoshop - Step-By-Step Guide to Adjust Color Temperature
Step 1 - Open Photoshop, go to Filter > camera raw filter and choose the image to edit.
Step 2 - Find a sliding temperature bar on the right side and adjust it to alter your image on a scale from cool blues to warm yellows.
Step 3 - Save the image and export it.
Erase.bg - An AI-based image Background Removal tool.
Now that you know how important it is to maintain the right amount of colour temperature in photos to make them look natural, appealing & captive. A fine mess in setting the right Kelvin number can spoil the whole appearance of the image.
Similar to colour temperature, it is also important to pay attention to the background of your images. If your images have a distractive, loud or busy background, it will not only make them look poor and shift the customers’ focus from the product itself.
Fortunately, various online image background removal tools are available that can help you eliminate or replace an image’s background, such as Erase.bg. Erase.bg is a free, easy, lightweight & AI-based online image background removal tool that allows you to remove image backgrounds within seconds with 100% quality retention. Just upload the image & let the AI do its processing.
The utmost benefit of Erase.bg is that it doesn’t require any technical & time-taking manual editing. The AI automatically detects the areas to remove. Its easy-to-understand user interface makes the process easier for beginners and pros. You can also download Erase.bg for your Android/iOS devices.
Step: 1 - Go to “Erase.bg” in your web browser. You can also download the Erase.bg app from the Google Play store/App store for free.

Step 2 - Select an image from your system and upload it to Erase.bg using the “+Upload image” Button. It also lets you “Drag & Drop” or paste the image address using the “URL” button.

Step 3 - Submit the image. The AI automatically removes the background from the image. It will take only 2 to 3 seconds.

Step 4 - The tool will deliver background-removed and original images after processing.

Step 5 - Download your image with a transparent background.

Step 6 - Erase.bg also allows you to change the background of your image. Just go to the “Edit” button. Select a suitable background, and finally, download the image.

Features of Erase.by:
- Free to download from Android/iOS devices.
- Easy to understand User-interface.
- No manual or technical editing.
- AI-based to automate the task.
- Lightweight so that it won’t occupy heavy space on your system.
- No sign-up requirements.
- Gives 45 Credits per month for free.
- Supports images up to the resolutions of 5,000 x 5,000 pixels and 25 MB in several formats, including PNG, JPG, JPEG, WEBP, etc.
- Faster & quality results.
- Batch processing in paid versions.
Wrapping Up
To conclude, we can say that if you are aiming to click stunning & natural-looking images, you must master the concept of colour temperature. While shooting, if you accurately consider the number of colour temperatures, you can minimise the colour correcting you must do in post-production. Additionally, it will give you the base for colour-grading your images.
FAQ's
How to fix the white balance in images?
You can fix the white balance by adjusting a custom white balance on the camera. Alternatively, you can fix the white balance while editing only if your image is a RAW file, not a JPEG.
How is colour temperature measured?
Colour temperature is a way to describe the delicate appearance provided by a light bulb. It is measured in degrees of Kelvin (K) on a scale from 1000 to 10,000.
How often should I adjust the white balance in your camera?
You must set the custom white balance in your camera every time you shoot in different lighting situations.
How Erase.bg can help remove background in images?
Go to Erase.bg and upload the image you want to remove from the background. The AI-powered algorithms remove the background within seconds.
How much do I need to pay for Erase.bg?
The “Starter” plan of Erase.bg starts from $29/month with 300 credits, while the Premium plan costs $299 per month for 5000 credits.
Does Erase.bg support batch processing?
Yes. Erase.bg supports batch processing in its premium plans.